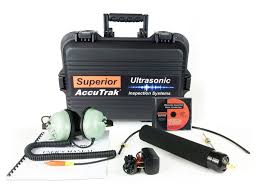
 ULTRASONIC LEAK DETECTOR |
ULTRASONIC LEAK DETECTOR –
Applications of ultrasonic devices:
- leak and classify leaks in compressed air, gas and vacuum systems and reduce your energy costs
- you can monitor the condition of your equipment, machines and determine the optimal maintenance time
- you can look for leaks in windows, doors, vehicles, parts, and enclosed spaces to meet quality requirements
- find signs of partial discharge of electrical equipment or insulation faults to ensure safe operation
- use to test steam lines, save energy, reduce vapor loss and steam system failures
LEAK DETECTION AND CLASSIFICATION Detect and classify leaks in compressed air, gas and vacuum systems and reduce the energy costs for your compressed air system by up to 30 percent. TIGHTNESS TESTING Identify leaks in windows, doors, vehicles, components and containers and ensure compliance with specified quality requirements. DETECTION OF PARTIAL DISCHARGES Increase your operation safety and find electrical partial electrical discharges and insulation damage.
CONDITION MONITORING OF MACHINERY Monitor the condition of your machines and systems, determine the optimal maintenance time and prevent unscheduled downtimes. STEAM TRAP TESTING Assess the function of steam traps and prevent energy and steam loss and damage to the steam system. |
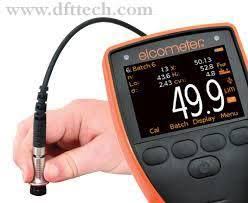 |
Paint coating meter : A coating thickness gauge (also referred to as a paint meter) is used to measure dry film thickness. Dry film thickness is probably the most critical measurement in the coatings industry because of its impact on the coating process, quality and cost. Dry film thickness measurements can be used to evaluate a coating’s expected life, the product’s appearance and performance, and ensure compliance with a host of International Standards.
A coating thickness gauge (also referred to as a paint meter) is used to measure dry film thickness. Dry film thickness is probably the most critical measurement in the coatings industry because of its impact on the coating process, quality and cost. Dry film thickness measurements can be used to evaluate a coating’s expected life, the product’s appearance and performance, and ensure compliance with a host of International Standards.
The non-destructive coating thickness measurements can be taken on either magnetic steel surfaces or non-magnetic metal surfaces such as stainless steel or aluminium. Digital coating thickness gauges are ideal to measure coating thickness on metallic substrates. Electromagnetic induction is used for non-magnetic coatings on ferrous substrates such as steel, whilst the eddy current principle is used for non-conductive coatings on non-ferrous metal substrates.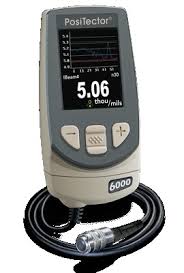 |
|
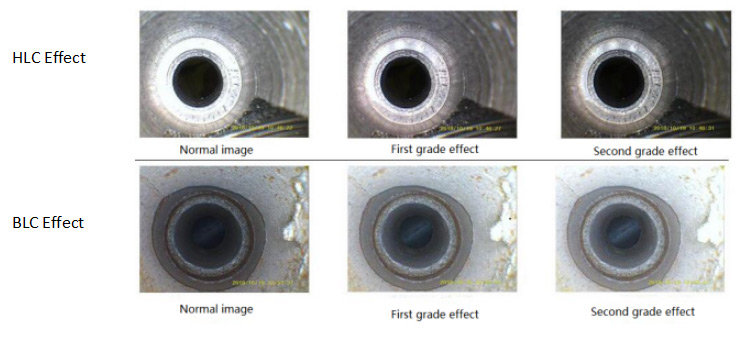
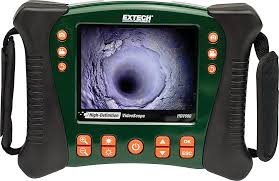
Remote Visual Inspection – Videsocopy
While vision may be the most acute of human senses, there is a limit to what our eyes can see. Unless a material is transparent like glass, we cannot see what lies behind it. In the field of nondestructive examination (NDE), there are situations where it is useful to look deep inside engines, gas turbines, machinery, behind walls, inside pipes and tanks, and into similar places where access is limited. Remote visual inspection (RVI) is a nondestructive technique that permits a user to visually inspect an area that has no direct visual access. In RVI, a slim and often flexible viewing device, commonly referred to as a “scope,” is inserted into the inspection area through a small opening providing an image for the operator to examine. Like all NDE tools, RVI allows an inspector to discover hidden defects before they cause major problems.
LED Lighting – Because the vast majority of RVI applications are done in areas where natural or ambient light is not present, most RVI setups include illumination systems to light up the area of inspection. Older systems would typically be AC powered and utilize high wattage bulbs to transmit light through fiber bundles into the area of interest to allow for visual inspection. With the incorporation of light-emitting diode (LED) technology, however, RVI systems have become less power hungry and been able to cut the cord. With the reduced power consumption of LEDs, current videoscopes are often battery powered and highly portable. In addition, new advances in technology allow the LEDs to be incorporated directly in the distal end of the insertion tube surrounding the CCD camera within. In the same way the image fiber bundle was eliminated via use of the CCD camera, the light guide cable can now also be removed, which increases the overall durability of the system. Furthermore, as the LED technology evolves and becomes brighter and more efficient, locating the LEDs within the tip permits upgrades in the field by swapping out a single interchangeable component.
Where Videoscopes Are Used – Important markets for RVI include the aerospace industry, power generation, pharmaceuticals, and petrochemical plants, as well as the automotive and manufacturing industries . The range of equipment spans from small-diameter borescopes used to pick locks to advanced videoscopes to inspect large turbine engines. For example, inspection of jet engines during periodic maintenance is a major application, permitting visual inspection of critical components with minimal teardown. RVI is also used for examining several other areas of aircraft where access is limited, such as flaps and rudder control mechanisms and airframes. Similarly, power generation turbines can be inspected for internal wear or other problems. In manufacturing, RVI can be used to inspect the inside of parts for hidden defects. |
|
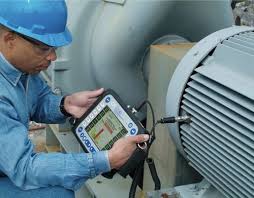
Vibration meter : To check the vibration of the equipment.
Vibration Meters measure vibration in velocity, acceleration, RMS, peak-to-peak and displacement. A vibration meter can be used to monitor and diagnose problems in bearings, machines, engines and more.
Condition Monitoring- Condition monitoring (or, colloquially, CM) is the process of monitoring a parameter of condition in machinery (vibration, temperature etc.), in order to identify a significant change which is indicative of a developing fault. It is a major component of predictive maintenance. The use of condition monitoring allows maintenance to be scheduled, or other actions to be taken to prevent failure and avoid its consequences. Condition monitoring has a unique benefit in that conditions that would shorten normal lifespan can be addressed before they develop into a major failure. Condition monitoring techniques are normally used on rotating equipment and other equipments like (pumps, electric motors, internal combustion engines, presses), while periodic inspection using non-destructive testing techniques and fit for service (FFS) evaluation are used for stationary plant equipment such as steam boilers, piping and heat exchangers. These services help in you in following way -More we Switch towards Predictive Mode more is the increase in Over Equipment Effectiveness (OEE%) .
Key Benifits :
• Increased electrical system safety
• Huge reduction in Energy Input cost
• Reduction in rotating equipment downtime
• Reduced alarm conditions which increases life of bearings and equipments.
Machine Condition Monitoring (Level 1):
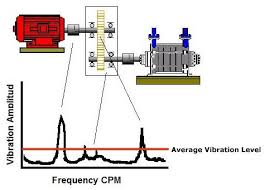
Machine condition monitoring calls for measurement of suitable vibration characteristic overall and diagnostic values, which allow the general vibration condition of the machine to be estimated. The trend development of these characteristic values points out condition deterioration, i.e. damage progression. This type of vibration measurement is characterized as ‘Level 1’. It allows monitoring of many aggregates without imposing high demands in terms of equipment and manpower.
Perfect Test House Machine Condition Diagnosis (Level 2):
Characteristic overall value (Level 1) measurements, however, are insufficient for precise localization of defects, as this requires closer analysis of the machine spectrum. Most types of damage can be detected by their characteristic frequencies or typical pattern of frequencies. ‘Level 2’ vibration diagnosis normally requires measurement of vibration signals using an FFT vibration analyzer by trained personnel who are experienced in interpreting vibration spectra. |
